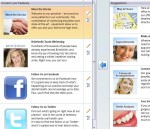
 Home Page Features are one of the most powerful options on your IDA web portal. You have total control to manage the features that appear on your home page and you can change and rearrange the features whenever you like.
IDA has provided a library of pre-written features on popular dental products and other web portal features that will link through to complete information on those products. You can select any of these features or you can write your own custom features.
We have also provided a pre-written library of featured links to many of the standard and optional pages on your IDA web portal – “Meet the Doctor” – “Smile Gallery” – “Office Tour” – and many more.
For each Home Page Feature you can include a headline, an image, text, and a link to another webpage.
It’s easiest to understand how much you can do with the “Home Page Features” area of the “Customize Portals” section if you see it on a live web portal. If you scroll down just a bit on the portal’s home page, you can see a list of pictures, text and links. These are “Home Page Features.” When your web portal is first built, it will not have any home page features. If you do want to display home page features on your portal, just go to the Control Panel and check the “Display on Portal” box in the top right corner.
You’ll see a list of suggested home page features on the right. If you like one, just select it and click the arrow to add it to the list of current live features on your web portal. Or click the “New Feature” button to create your own home page feature. I’m going to create a “Smiles for Life” charity promotion now. First, I’ll give the feature a title – that’s the headline that will be displayed on the portal. Next, I’ll write descriptive copy in the “Post” box. If you want to, you can also include a link to a page where patients can learn more by pasting the web address into the “URL” box and entering “Link text” like “Click to learn more,” but that’s optional.
Adding a picture to your new feature is also optional, but if you have a photo, why not add it? Click the “Optional Image” tab, then click “Select” add choose an image from your image library, or upload one from your computer. The image should be 125 pixels wide. Click “Save” to save your changes, then check out the new feature on your live site to make sure you’re happy with how it looks.
Edit any feature by clicking the pencil icon, or delete by clicking the trash can icon. Reorder your features with the arrow buttons.
I really want to emphasize what a powerful tool the home page features are when it comes to customizing the content of your web portal. You can highlight anything you want – products, services, events, awards – whatever you like. You can have home page features that link to your doctor profile, that link to articles you’ve written, even that link to your Facebook page. It’s a fun and easy way to add some zest to your web portal!