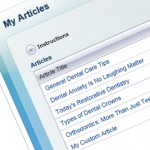
 The articles that you write or select from our library will appear in the “Dental Info Center” section of your dental web portal.
You can write your own dental articles here and they will be available for inclusion on any of your dental practice websites as soon as you set the status as “final.” Just click the “New Article” button to start.
You can also customize any of our pre-written articles by clicking on “Customize” to the right of the article title.
To select articles to appear on a particular web portal, please go to the “Selected Articles” section of the “Customize Portals” section and check the appropriate articles.
Any articles you choose to make available to your patients will be displayed as part of the “Dental Info Center” on your web portal.
You don’t even have to do any writing; we provide hundreds of stock dental articles for you to choose from, organized by topic area; just click “View” to preview each article. You can use them as they are, or you can click “Customize” to edit the articles however you please, then “Add” them to your library of articles. Or, click “New Article” to write your own article from scratch.
You’ll see your list of articles at the top of the page. Click the trash can icon to remove an article from your library, or click the pencil icon to edit it. You’ll see that each article is assigned to a topic area. You’ll also notice that each article has a status of either “Draft” or “Final.” Your web portal will not include any articles with “Draft” status, so when you’re ready to publish the article, change its status to “Final.” The text of the article is shown in HTML, but you don’t need be a programmer to edit the text. All you need to know is that the little “p” tags indicate paragraph breaks.
If you click the “SEO” tab (that’s short for “search engine optimization”), you’ll see the title, description and keywords for the article. If you choose to edit this content, don’t mess with the text in curly brackets – those are merge codes where your personal information will automatically appear. Finally, there’s a “Notes” tab where you can keep private notes that will not be visible to website visitors.
Uploading an article to the “My Articles” section does NOT automatically include the article in your web portal – that takes just one more step. In the “Customize Portals” section of the control panel, click “Selected Articles” to choose exactly which articles from your library will appear on that particular portal.
If you want to include stock articles, there is no need to load them in the “My Articles” section. You can select stock articles directly from the “Selected Articles” area of the “Customize Portal” section.